Logging in to jetstream from your local terminal with a key file
Some of us have had problems with the web shell and getting into the Jetstream portal. These materials will show you how to log in using an SSH key through your local terminal.
Concerning Keys
Cryptographic keys are a convenient and secure way to authenticate without having to use passwords. They consist of a pair of files called the public and private keys: the public part can be shared with whoever you’d like to authenticate with (in our case, Jetstream!), and the private part is kept “secret” on your machine. Things that are encrypted with the public key can be be decrypted with the private key, but it is computationally intractable (ie, it would take on the order of thousands of years) to determine a private key from a public key. You can read more about it here.
Getting your instance IP address
In order to connect to your instance, we need to know its IP address, its unique identifier on the internet. This is listed in your instance details, circled below:

Now, things diverge a little.
Setting up keys
- Open a terminal window (either
terminalon OS X, or git bash on Windows). - Navigate to your home directory:
cd ~
- Find out if you already have a
.sshdirectory with a public private key pair:
ls .ssh
And look for 2 files: id_rsa and id_rsa.pub
If you DO NOT have this directory, or those two files are not present,
- run a program to create a key-pair:
ssh-keygen
- Accept the default location, and don’t set a password.
Finally (whether you made a brand new key, or not)
- Copy the contents of
id_rsa.pubto your clipboard. (this is your “public key”) - Go to your Jetstream account and click your username in the upper right corner.
- Click ‘Settings’
- Click ‘show more’ under ‘Advanced’
- Under ‘SSH Configuration’ click the plus symbol
- Paste your public key into the second box
- In the top box, give your key a name so you know which private key it’s associated with.
Now, when you start a new instance, your public key will be added automatically and you can login without a password.
- SSH into your instance
ssh [username]@[instance-ip-address]
- You should connect automatically(-ish) (without setting or typing your password)
If you have an already running instance that you want to access in this way,
- Open a new terminal (git bash on Windows) window.
- Copy your public key to your instance:
scp ~/.ssh/new_key.pub [username]@[ip-address]:~/.ssh/new_key.pub
- Using the web interface or logging in using your username and password, navigate to the correct directory:
cd ~/.ssh
- Use
ls -ato display files. You should seenew_key.pub - Copy that key into your authorized keys file:
cat new_key.pub >> authorized_keys
- Retry ssh to see if it worked.
ssh [username]@[instance-ip-address]
If it didn’t work, go to the instance Jetstream page and “Redeploy” your instance, and then retry the ssh command.
Hopefully should now have access to atmosphere within your local terminal!
Notes for Windows
For Windows, we need to install a terminal. Here we’ll use mobaxterm.
Install mobaxterm
First, download mobaxterm home edition (portable) and run it.
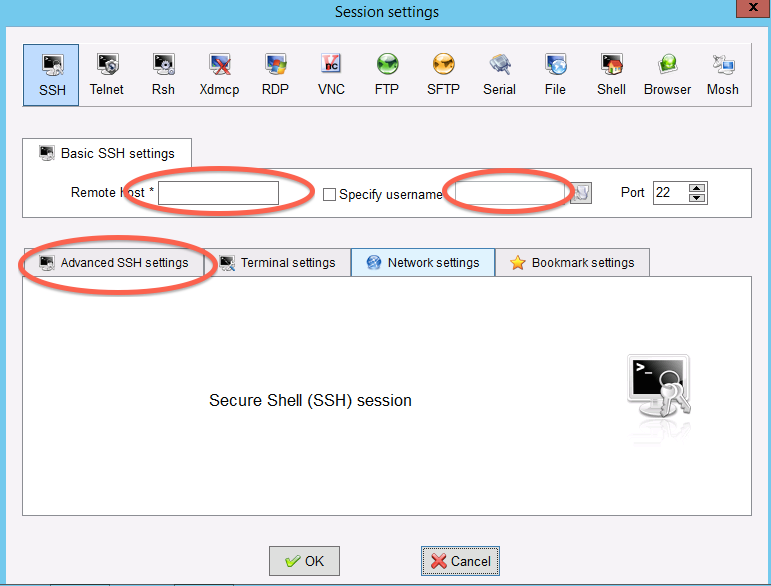
Start a new session

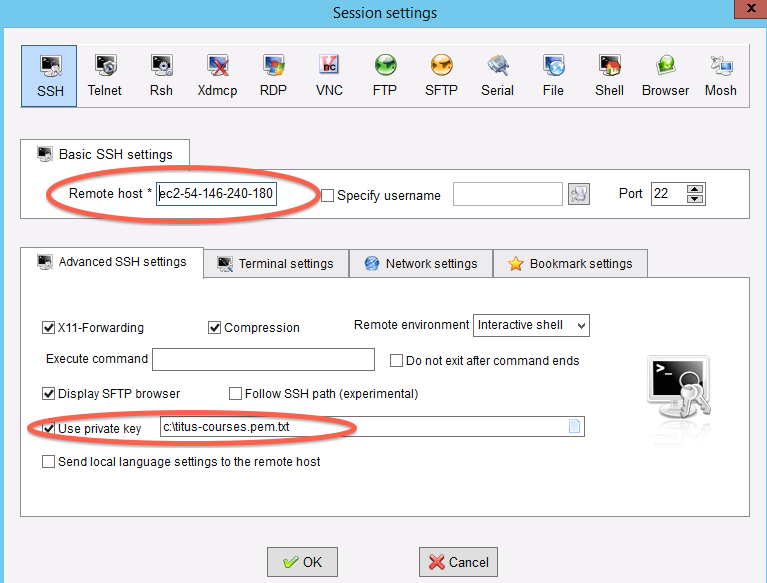
Fill in session settings
Fill in your “remote host,” which will be the IP address from earlier. Then select
“specify username” and enter tx160085.
Specify the session key
Copy the downloaded private file onto your primary hard disk (generally C:) and the put in the full path to it.